3. Create your contacts
Now that you've created users, you can start creating contacts to whom they can send documents for signing.
Note the difference between the two: users have access the eSignatures platform, while contacts receive documents for signing.
Tips:
- Contacts can be added to contact groups. This way, every member of the contact group can sign a document on behalf of the entire group.
- Contacts and contact groups can be shared amongst all users. This way, it's no longer necessary to create a contact list for every user individually.
To start creating contacts:
- Log in to eSignatures.
- Click the settings icon in the main toolbar, and click Contact List.
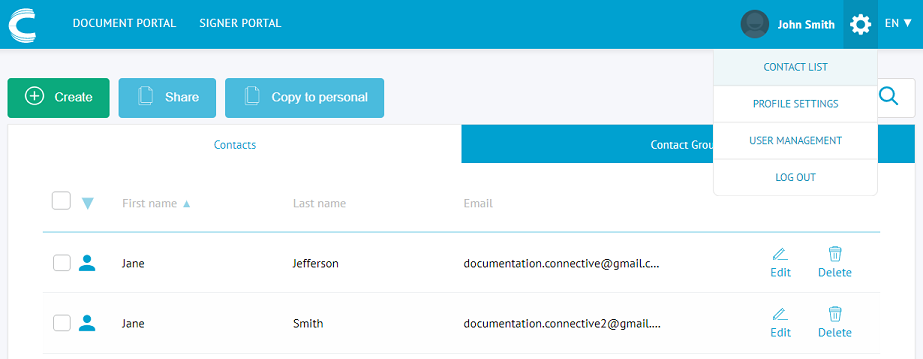
- Click Create to create a new contact.
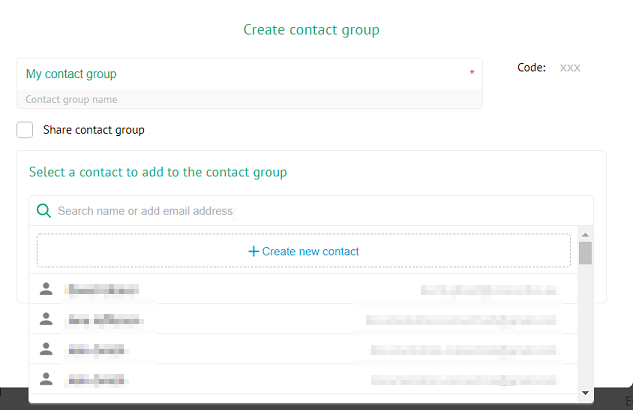
To start creating contact groups:
- Log in to eSignatures.
- Click the settings icon in the main toolbar, and click Contact List.
- Click the Contact Groups tab, and click Create to create a new group.
- Enter a group name and select the contacts you want to add.
For detailed info on how to create, manage and share contacts and contact groups, see the corresponding sections in the User Documentation.
Click Next to go to the next step.